LinkedIn Sales Navigator is a powerful tool for generating highly targeted B2B leads, but the platform doesn’t offer an easy way to export these lists.
To make the most of your Sales Navigator account, it’s important to know how to export lead lists, so below are four proven methods to help you export leads from Sales Navigator, giving you have the data you need for your outreach and prospecting.
Export leads from a group
Exporting leads from LinkedIn groups can be a great way to target niche-specific contacts. If there's a group for it, you can use it for prospecting targeting. This applies to things as niche as finding yacht owners, no-code enthusiasts, vegans or foodies.

Steps to export leads from a group:
1. Find the right group
Search LinkedIn for groups that are relevant to your target market.
2. Join the group
You can only export leads from groups you are in so you'll need to join any groups you want to export leads from. It's worth noting that some groups are invite only, and it will take a couple of days for your request to join to be accepted.
3. Open a new lead search
Within Sales Navigator, click 'Lead' to open up a new lead search.
4. Add a 'group' filter
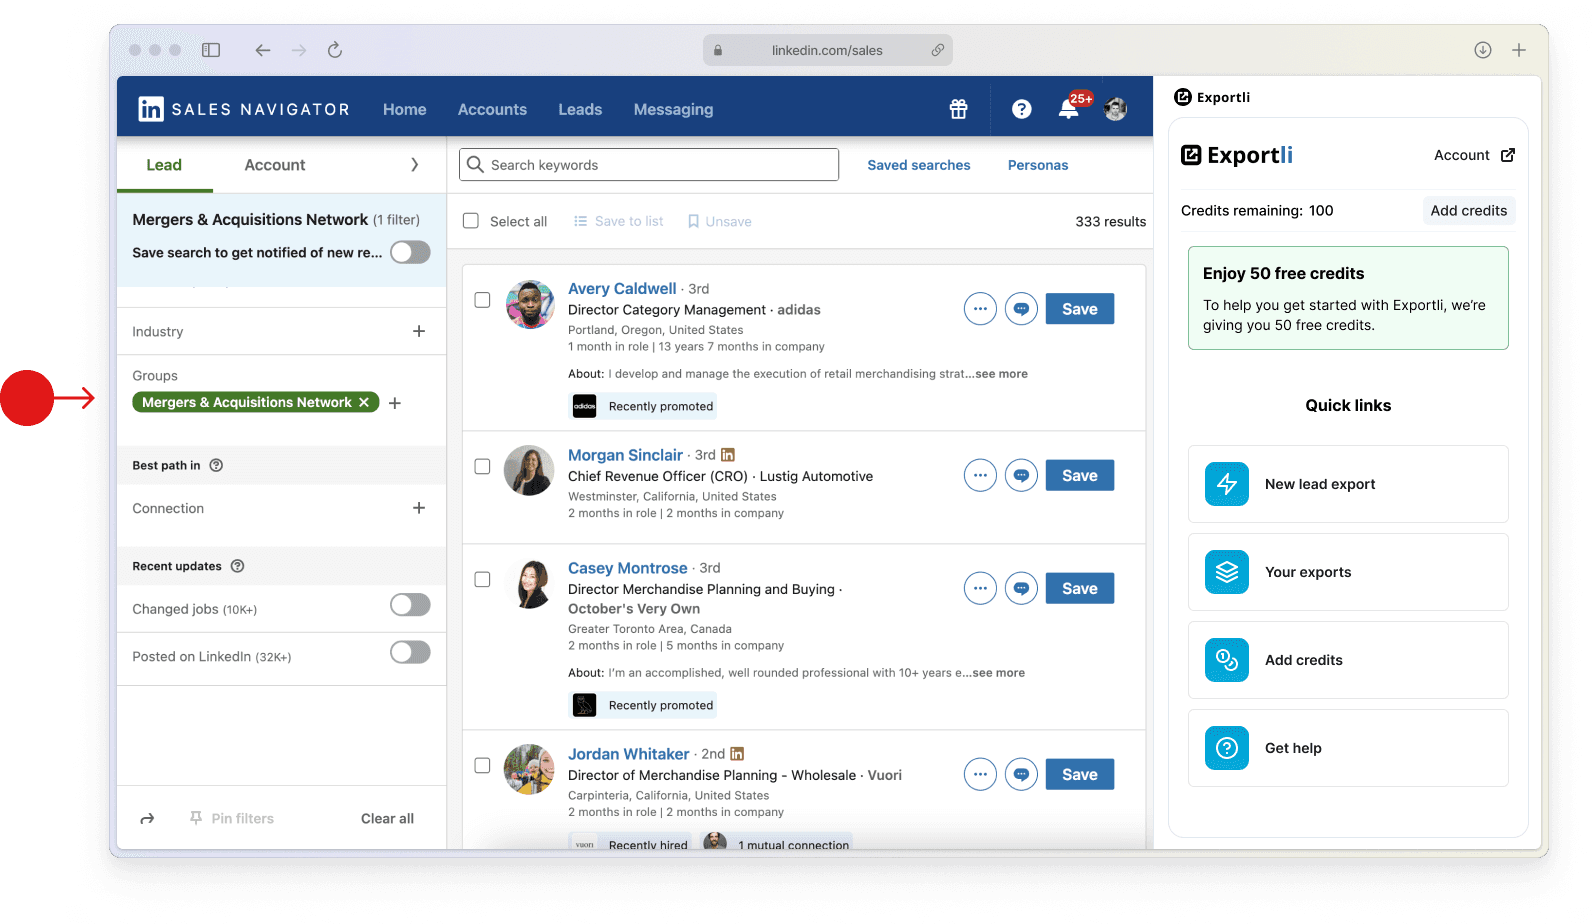
Expand the filters sidebar and within the 'personal' section you'll see a field called 'Group'. In here you should search for the group that you joined and want to export leads from.
5. Export your results
Once you've installed the Exportli Chrome Extension you'll see a button called "New lead export" which will kick off the process of exporting your leads.
Export leads from account lists
If you're doing AMB, one of the most effective ways to export Sales Navigator leads is based on your pre-saved target account list. This method allows you to focus on specific companies and gather leads who belong to those companies.

Steps to export leads from your saves account list:
1. Create an account list
Use account filters to target companies that resemble your ideal customer profile such as company headcount, headquarters location and industry. Give this account list a name and save it.
2. Go to lead search
Within Sales Navigator click 'Lead' to open up a new lead search.
3. Add an 'account' filter
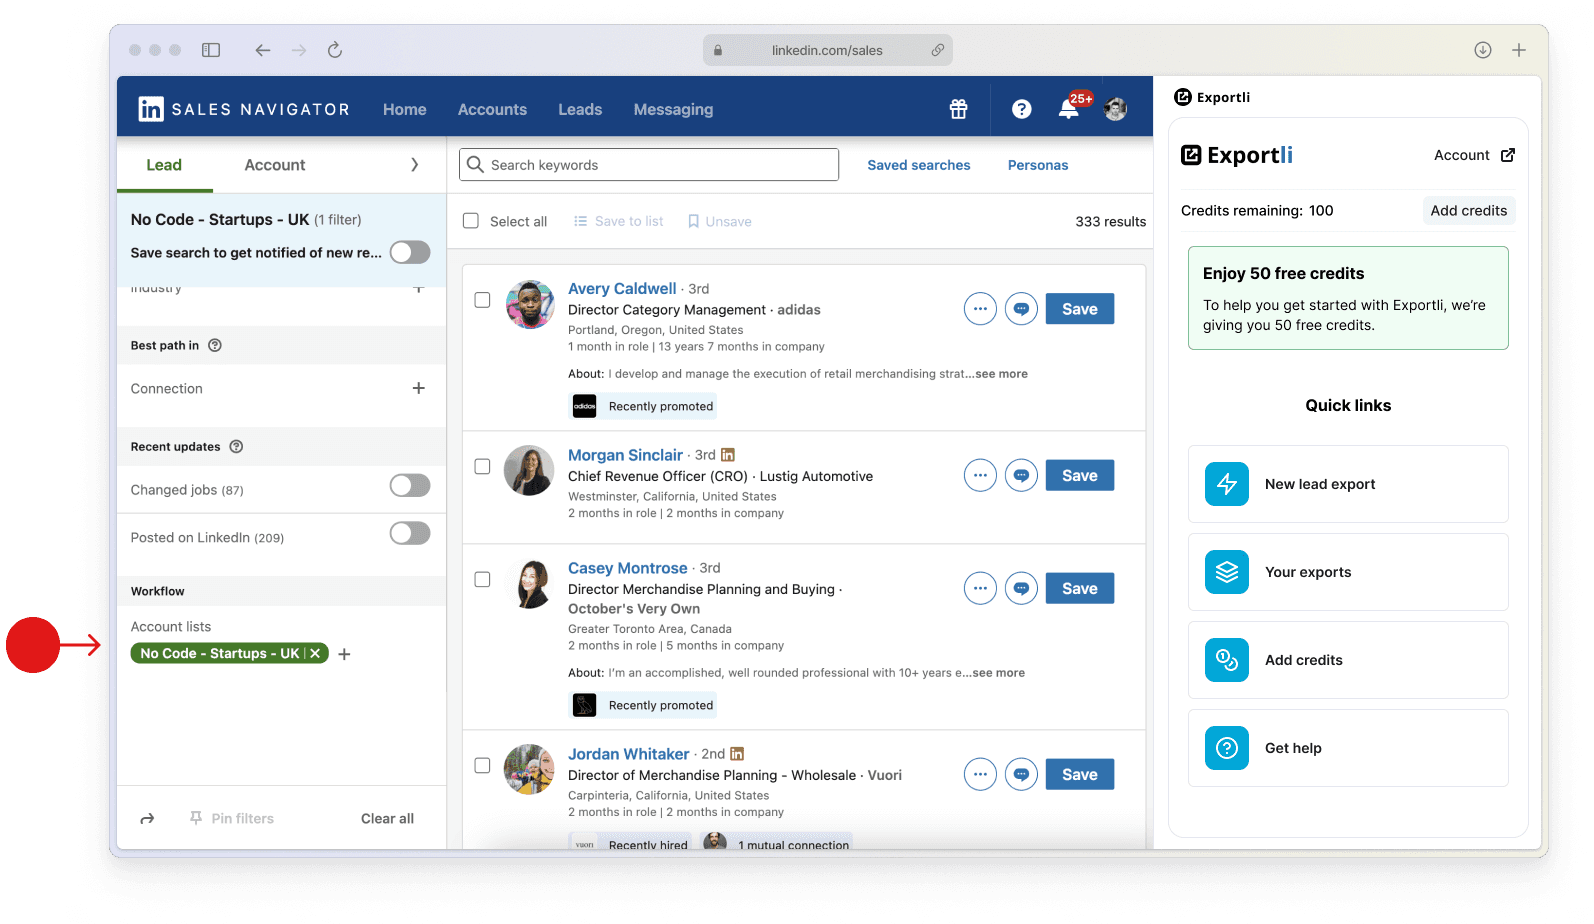
Expand the filters sidebar (on the right) and within the 'workflow' section you'll see a field called 'Account lists'. In here you should search for and include the account list you just created.
4. Refine your list
Use additional filters such as job titles, seniority and function to tailor your list to include only people relevant to your prospecting.
5. Export results
With the Exportli Chrome Extension you'll see a button called "New lead export" which will start the process of exporting your leads.
Export leads from saved lead list
If you’ve already saved a list of potential leads within Sales Navigator, exporting them is super easy.

Steps to export leads from a lead list:
1. Navigate to your lead list
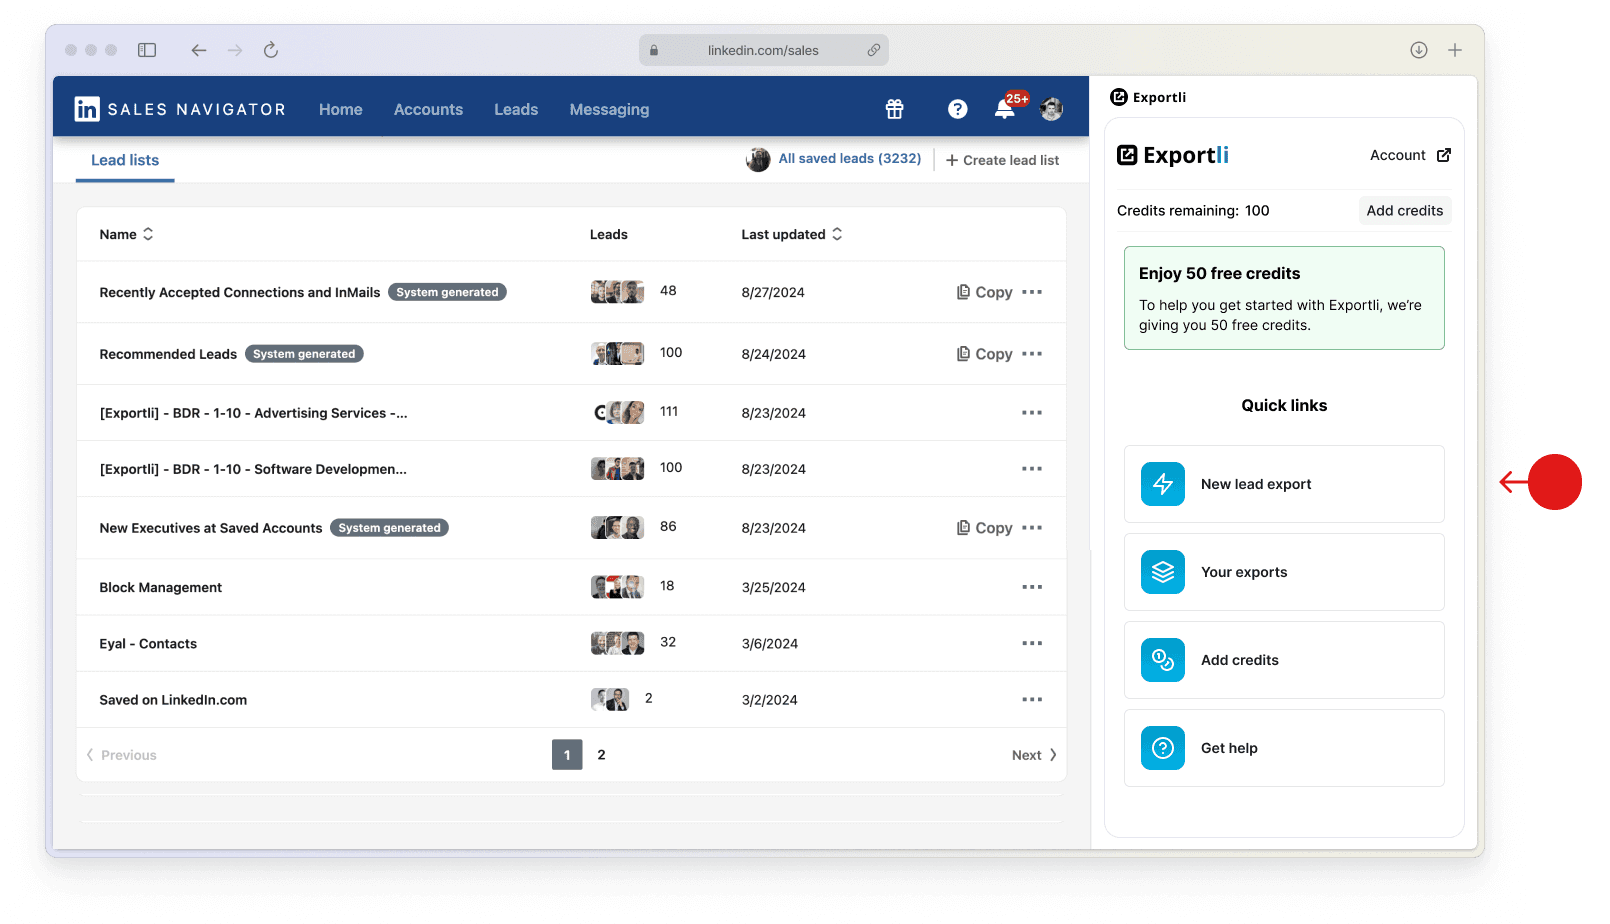
Go to the ‘Lead Lists’ section in Sales Navigator and choose the specific lead list you want to export.
2. Export the lead list
Once you've installed the Exportli Chrome Extension and navigated to your lead list, you'll see a button that says "Open Exportli". Clicking this button will open Exportli and guide you through the process of exporting your leads.
Export leads from a search
Exporting leads directly from Sales Navigator’s search function is one of the simplest methods available.

Steps to export leads from search:
1. Run a lead search
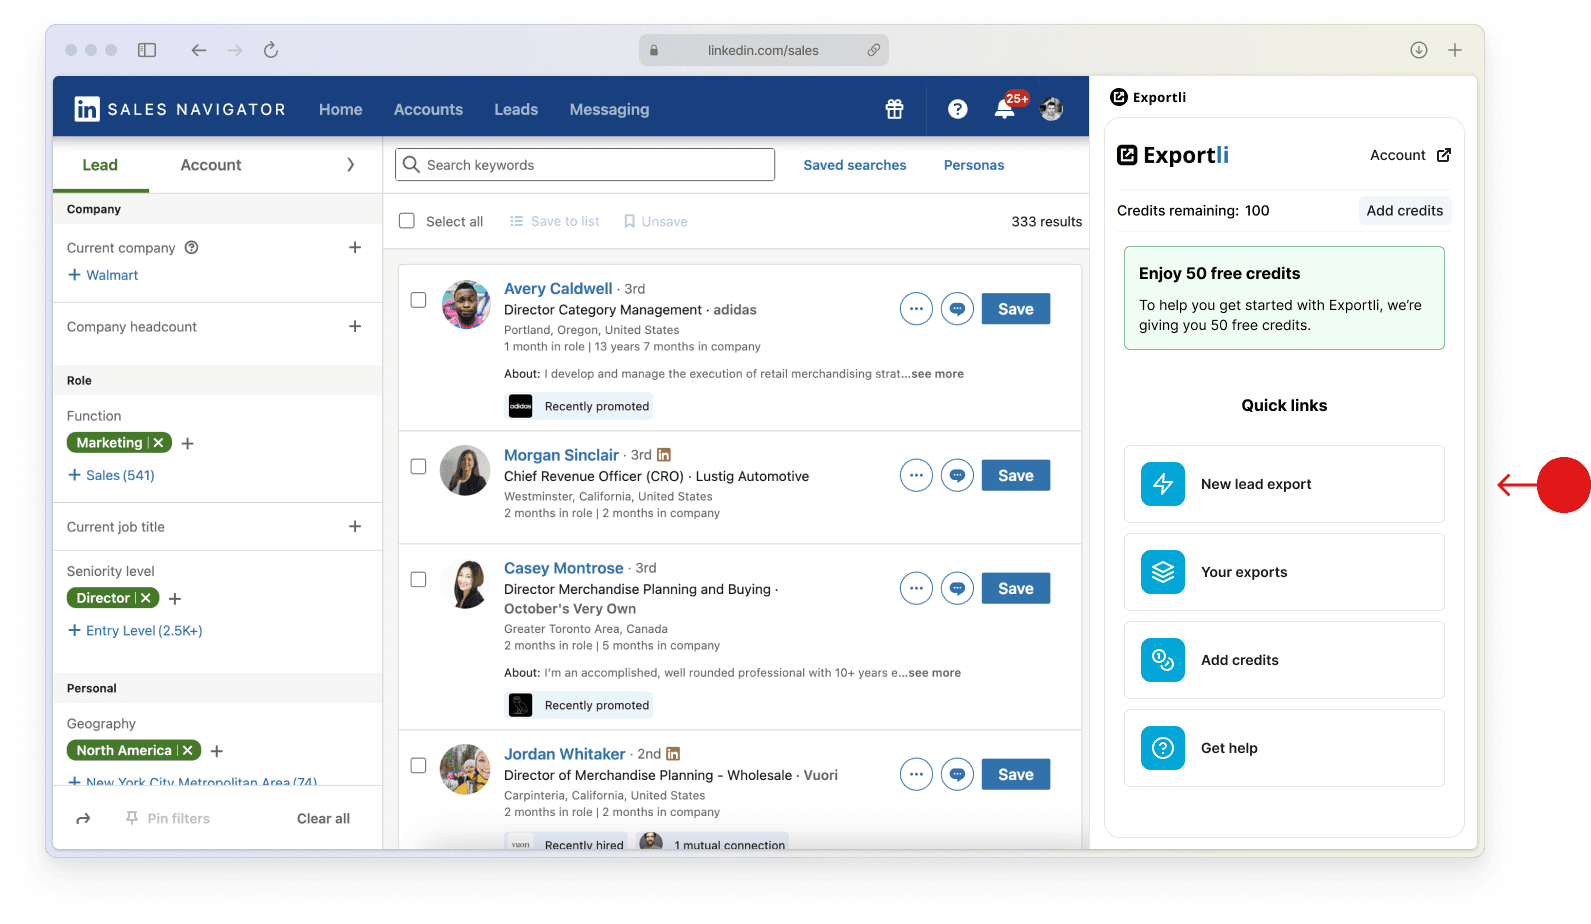
Use Sales Navigator’s advanced search filters to find leads that match your target customer.
2. Review search results
Narrow down your results by applying additional filters to ensure relevance. You should refine your list down to less than 2,500 profiles, which is the maximum number of leads you can export in a single day.
3. Export the search results
With the Exportli Chrome Extension installed you'll see a button to start "New lead export". This is begin the process of exporting your leads into a CSV.
