Step 1
Understand how LinkedIn industries work
While a lot of this guide is still relevant for all versions of LinkedIn, it is primarily designed for people using LinkedIn Sales Navigator.
Learning how LinkedIn’s industry classifications work can be a game changer for sales and marketing professionals looking to to build targeted lead lists for B2B outreach.
In Sales Navigator, LinkedinLinkedIn presents industries as a flat list of over 400 industries, but under the hood there is an underlying hierarchy which is not at all visible to users.
By understanding what this hierarchical looks like you'll be able to create larger, more relevant lead lists.

For instance, imagine you are targeting manufacturing companies…
You could spend hours searching for the 90 relevant sub-industries, such as Metal Treatments, Chemical Manufacturing, and Semiconductor Manufacturing.
OR, you could simply select the ‘Manufacturing’ industry. Behind the scenes, this is a 'parent industry' which automatically includes businesses in any of the 90 sub-industries.
Simple, but it'll save you a bunch of time and help you build large, and relevant lists lists.
Step 2
Choosing industries to target
Tip 1: Start with a broad industry and refine using exclude filters
When setting up your filters, start with a broad parent industry and then exclude specific sub-industries that are less relevant to your goals. This approach helps in casting a wide net while maintaining the relevance of your leads.
Some examples include:
Choosing “Healthcare” and excluding “Alternative Medicine” to focus solely on traditional medical sectors.
Tip 2: Create account lists first, before lead lists
We find that the best way to build lead lists in LinkedIn Sales Navigator is to run a two-step process:
1. Focus on making a list of ICP (Ideal Customer Profile) companies using the Account search view. The Account view offers more advanced ways to filter based on company properties such as growth rate, industry, and recent activity.
2. Once you have a highly targeted list of accounts, switch to the lead search view and add an ‘Account list’ filter to search for leads who work at companies in your ICP account list. From here, layer on more filters such as job title, seniority level, and language to further refine your lead list.
Tip 3: Explore related industries
Don’t limit yourself to direct industry filters. Explore related industries that might also be relevant to your target market.
Some examples include:
If you’re targeting “Healthcare,” consider looking at related industries like “Medical Devices” or “Biotechnology.”
For “Finance,” explore related fields such as “Investment Banking” and “Venture Capital.”
Tip 4: Use geographic and language filters
Refine your account search by adding geographic filters to target leads in specific regions or cities. If you’re targeting customers in countries with multiple languages, add a language filter to your lead search.
Tip 5: Use company size filters
Combine industry filters with company size filters to find leads that match the scale of businesses you are targeting. This can help tailor your approach for small, medium, or large enterprises.
LinkedIn industries
Select an industry below to learn more about it, and where it sits in the hierarchy.
Step 3
Setting up your Sales Navigator search
Setting your lead filters
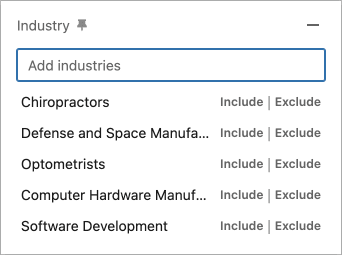
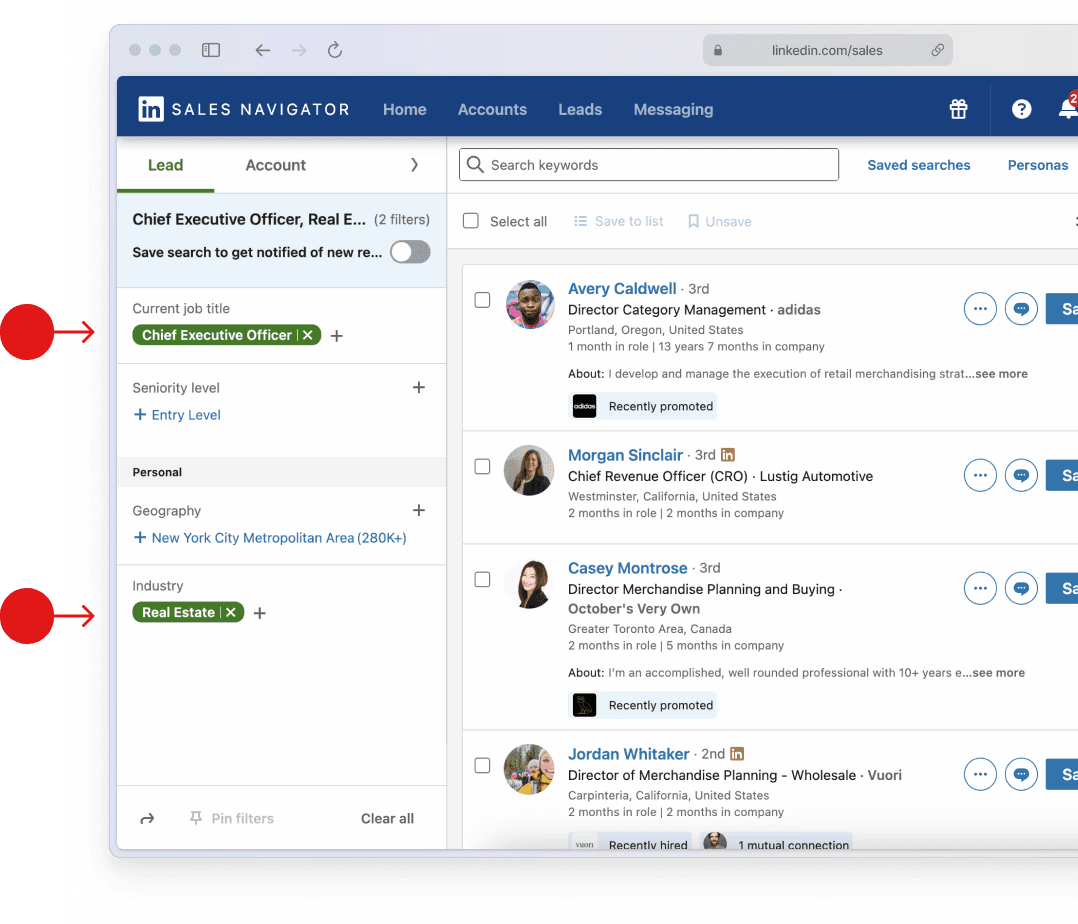
Within LinkedIn Sales Navigator go to the ‘Leads’ tab and use the filters on the left side to narrow down your search.
Enter the names of the industries you want to target in the ‘Industry’ filter, and narrow down your search by using other filters such as role, geography etc.
Step 4
Export your leads
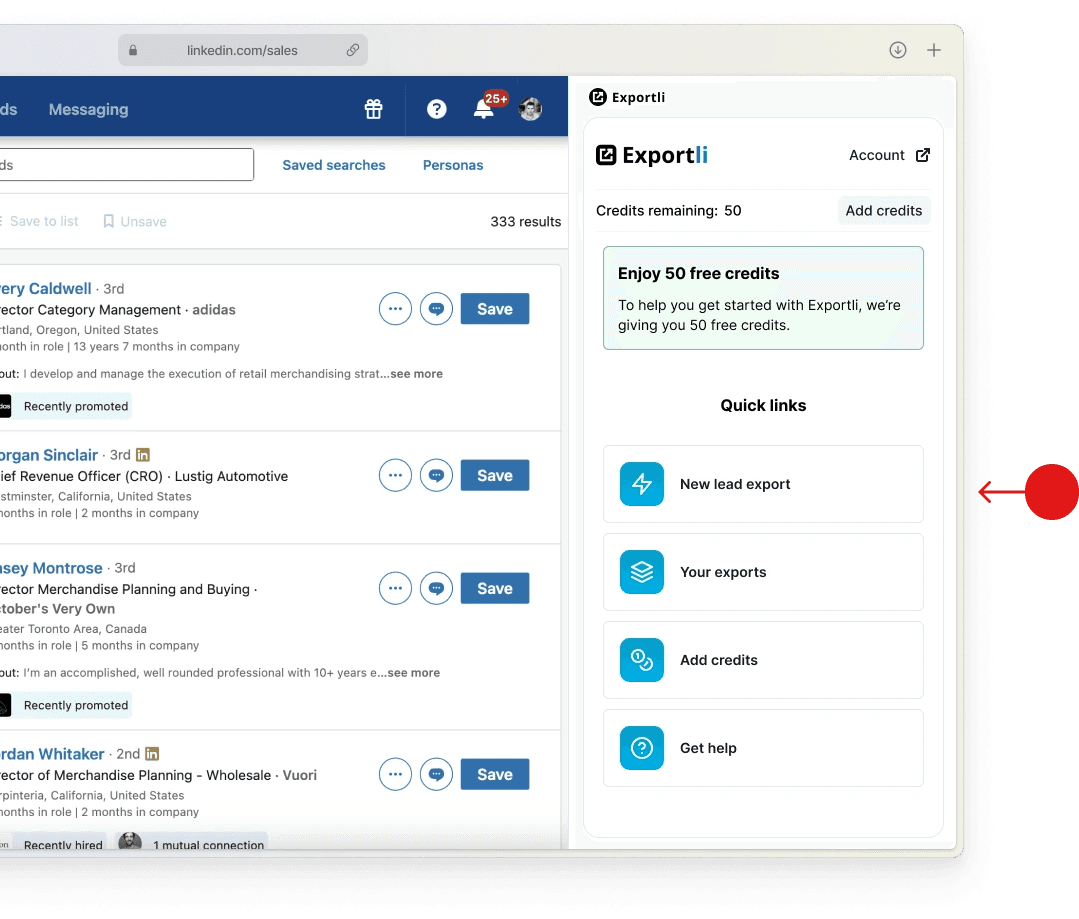
Install the Exportli extension
Begin by downloading the Exportli extension from the Chrome Web Store and adding it to your browser.
The extension works seamlessly with Sales Navigator to automate the exporting of your lead lists.
Sign up for an Exportli account, which offers a free plan to help you get started without spending any money.
Run your lead export
Go to LinkedIn Sales Navigator and view the list of leads you have saved.
Use Exportli to initiate the export of your lead list. The tool will gather detailed information such as job titles, company names, locations, and more.
Step 5
Import to your CRM or email tool
With your leads exported to a CSV file, you can now import them into your CRM or email outreach tools.
Most tools will let you import CSVs including:


